This brief had two parts, but both answered the same problem. I wanted this brief to stretch my imagination and the limits of menu design. I didn't want this brief to have a particularly obvious solution and I wanted the menu's to serve more of a purpose than an ordinary menu would. The solution to the Chaophraya menu I feel opens up a whole new window to take away food. I enables a quiet night in with a take away to still be one of an experience and memorable a memorable one. The Chaophraya menu design enabled me to research deeply into consumer experience within food and what people want out of the experience. I feel with my take away experience that I have designed I have created a service that has not been done before and that also answers the brief in generating more money for the company.
Pickles and Potter was the other half of the brief and I feel here that I have tapped into a part of the market that hasn't been explored digitally yet. The solution of a daily updated app helps to keep customers interested and involved in the company with an ongoing exchange of information. Throughout this brief I have learnt more about app development, which I think is a key attribute to have in the ever increasing digital side to consumerism. The designing of an app means that you need to think of the story and journey that the customer will take with your product and meant that I needed to deal with ease of use, readability, accessibility and the fundamentals of weather the app would work.
I could have furthered these projects by adding more food companies to the list, however I didn't do this because I felt that I had explored greatly the ways that the said companies could generate more profit through menu design. If I were to further the project by creating more apps and take away design I feel it wouldn't have helped me grow as much as the initial menu's had; I would have been repeating myself and only putting into practice skills that I already had.
Overall I have enjoyed this brief thoroughly because it has had many different sides and problems to deal with. It has taught me a lot about both the craft and digital side of advertising food companies and has deepened my interest in designing for food stuffs.

Monday, 4 June 2012
Brief 3 - Evaluation
This brief was a collaboration with myself Kim Sandford, Charlotte Warren and Becky Tipping. This brief has helped me learn a lot about working for a real client and tight deadlines. This brief out of all of my FMP projects has tested my design skills and knowledge the most.
This brief needed tight time schedules, good communication skills and determination. The brief timescale that we were originally set tured out to be much less that anticipated. Originally we were to be given a couple months to collect order and layout the yearbook. Instead we ended up with 3 days where we had to organise all of our information and transform it into a respectable and working yearbook for the fashion pathway B.
Because the deadlines that the fashion teams were given by their tutor were very late in the brief this meant that we only received the vast majority of the images for each student a couple days before the book was to be sent off to print. This meant that in the meanwhile we had to make sure that the layout grid, spacing, concept, covers, page numbering and anything else that could be done without the pictures was put in place. This meant that we had a yearbook of information, but nothing to fill it. As a group we found it quite hard to decide on the layout and cover ideas because we didn't have any of the content for the book. We therefore had to pick a fairly neutral concept and colours for the design so that the images could speak for themselves and weren't overshadowed by our designs.
We designated 9-10 students per person in our group so that we were in charge of their layouts to help break it down.
Further roles were:
Kim: Front Cover, Images grid, liaison
Charlotte: Front Cover, final tweaking, typography
Becky: Breaker Spreads
Me: Contents page, page numbering, Back Cover, acknowledgements layout, quotes layout.
Working for a real client and getting the book published in its 100's meant that everything had to be perfect and this but a great strain on our group, however I feel that we rose to the challenge. I have also learnt more about setting documents up to print looking at file types, sizes and layout.
I have learnt that deadlines can be very short but if you work to your full capacity it can be done. This seemed like an impossible task, however because we knew that it HAD to be done, we made it happen. It helped to encourage me to know that I am more capable that maybe I once thought. Communication between our group was good and I think overall we worked well together and came out with a result that we are all happy of.
Brief 2 - Evaluation
This brief has introduced me to a different side of graphic design that I haven't previously visited. Make up design branding has to be very versatile to work across a whole range of products. It also has to stand out amongst the crowd in a very saturated market. The direction that I took with this brief was to design the branding to see a different side to make up branding as it is seen today. Make-up brands are seen as very self assured and strong, however this brief wanted to appeal to teenagers. From research it showed that teenagers adopt many different styles and as they are at a very influential stage in growing up they are experimenting and finding out hy they really are. The rebrand of 17 therefore aims to help teenagers in this transition between teens and adults, helping them to experiment freely and be accepted for being who ever they want to be - through the medium of make-up.
I feel I have learnt a lot about print finishes and packaging during this brief. I have also learnt a lot about the importance of understanding the needs of the target market. Understanding the target arket can mean the difference between your product working or flopping.
This brief also enabled me to experiment with pastel make-up on a photo shoot as part of my concept. I found the photo shoot a very enlightening experience. It taught me the importance of having a design direction and being able to direct people on set. Getting the right shot is key to making the advertisement work.
Weaknesses within this brief I feel lie within the production of the packaging and label designs. I searched for somewhere that I could get prototypes made for the packaging however there were none that would be of a suitable budget or time scale. If I were to get the prototypes made this would have made the whole brief look a lot more professional. Instead I had to make to with my own best judgement as to how the products could look most professional and me produced by myself.
Overall I am quite pleased with this brief, I feel I has answered the problem and I think it would work well in a retail environment. The branding is unique and not like anything on the market at the moment and I have learnt a lot along the process that will aid me in future projects.
Tuesday, 29 May 2012
Brief 1 - Evaluation
This brief has helped me gain experience and knowledge in the more practical side of graphic design. I designed and made all of the packaging using materials, equipment and departments within the college that I never have before. I found it very exciting and interesting to re visit skills that I haven't used for a few years, such as sanding, buffing and sawing. It helped me to get hands on with my work which I feel is something I may have perhaps lost touch with through out the last year. Also, it tok me away from the computer and looking at 2D and paper based ideas for a while, which in turn helped to give me a different perspective and refreshing insight into the capabilities within both graphic design and with myself.
Trial and fail was a big part of this project as sometimes I was relying on machinery to accurately cut out the acrylic for the test tube housing and this proved to be very inaccurate. I then had to find other ways to solve this problem and this ended in a longer hand made process taking more time and making my schedule fall behind. In the end however, this made the better result and finish for my product.
I feel if I had more time I would have done more initial research and development for this brief however, the short time scale that I was left with made me have to think on my feet and design as I was creating in some places. I am very happy with the overall result and I think this is because every design decision that was made had reasoning and thought behind it. The product solves the problem in the brief and I could see it on a shelf in a high end retail environment.

Friday, 25 May 2012
Brief 1 - Crafting and Making
So the test tubes arrived with the cork stoppers. They look as I want them to with the rice inside.


Then I needed to work out the size of the test tube box. I stood the test tubes up as they would stand in the packaging to get measurements.
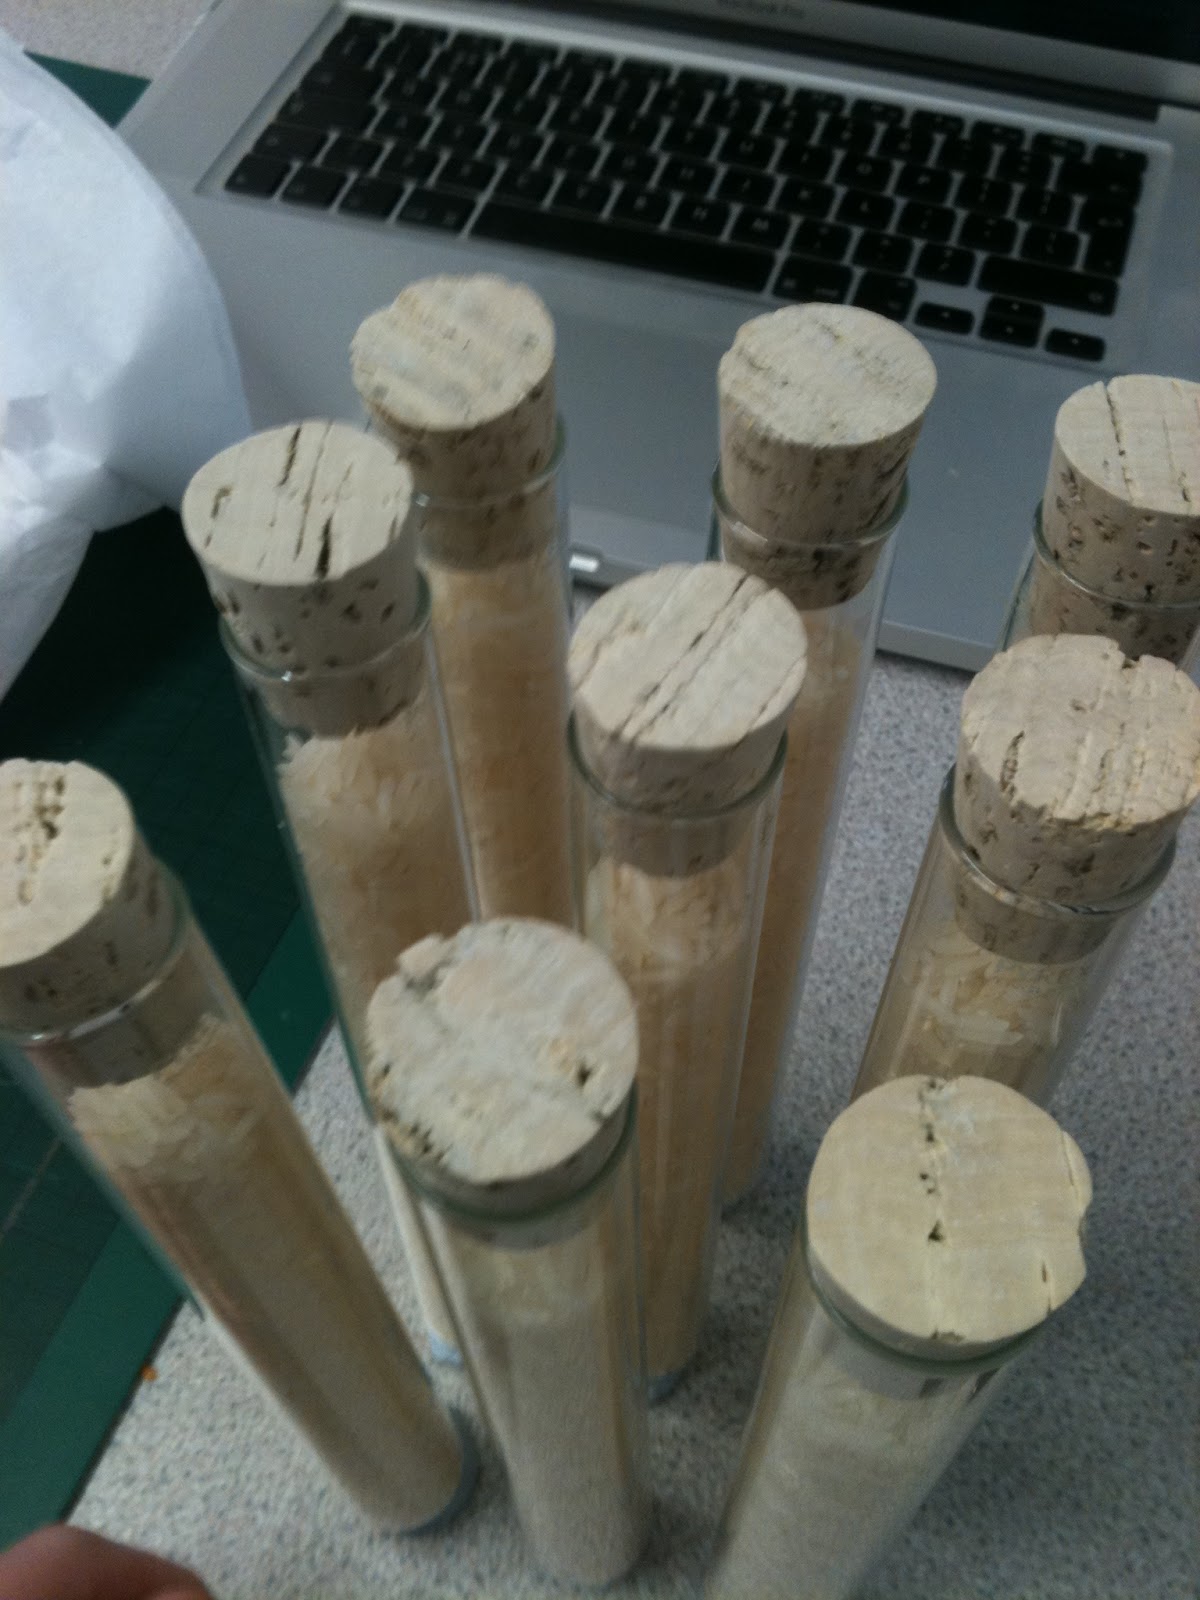


I then tested out the size of the holes to make sure that the tubes would fit through.

The nest step was to laser cut out the sections to house the test tubes...
 |
| This is the net that I used on the laser cutter with acrylic. The dimensions of the square lids are 10mmx10mm and the height is 190mm. With the acrylic being 3mm thick Whilst making the net I needed to take into account the sides that needed to be shorter because of the 3mm thickness. |
My first attempt was a bit of a disaster. The reason I found out later was that the laser cutters weren't aligned properly so when I was trying to cut out a rectangle it came out more like a trapezium. This of course wouldn't work for the packaging because it would all be wonky and not stand at a right angle.
On my first day in metalwork with my acrylic pieces, the tutor, Liz and myself were confused as to why the sides weren't at right angles, so I spent the whole of this day measuring, filing, sanding and buffing up the acrylic to make sure all the sides were at right angles and that all the shapes match up together. After 7 hours in the workshop and finally ready to glue the sides together we realised that the box just wouldn't fit together. This was a combination of the bad laser cutter and filing and sanding meaning that the pieces weren't perfectly matched....
I was advised by Liz to cut out the pieces again on the laser cutter...at which point we didn't yet know that the laser cutter wasn't aligned properly. So my next attempt on the laser cutter was obviously not a success, so I seeked help from the woodwork technician, who firstly solved the mystery of the wonky sides and then kindly said he would cut them out using a HUGE saw in the workshop. After he had cut out the pieces they were all perfectly squared and all I had to do was wet and dry them with 1000 grain sand paper and buff them to a shine.


The sides were glued together with an acrylic based glue that bonds the sides together to made a solid structure. Because the sides were transparent it was very important when gluing to be as neat as possible because everything would be visible. For little mistakes acetone was rubbed over the glue to get rid of it before it dried.
The acrylic was held together with masking tape whole it dried. This took approx. 5hours until I took the maskin tape off.


The next stage was to use vinyl to stick to the acrylic in the shape fo the branding logo.
Below is the printed sheet cut on the vinyl cutter. Some of the type was too small to be cut properly (the instructions of how to cook) however the logo came out fine.


I cut out the ares of the vinyl that I wanted to use and stuck masking tape over the top. I then placed it where I wanted it to go and used a scalpel to carefully stick the vinyl to the acrylic. I also stuck a smaller logo onto all of the test tubes.


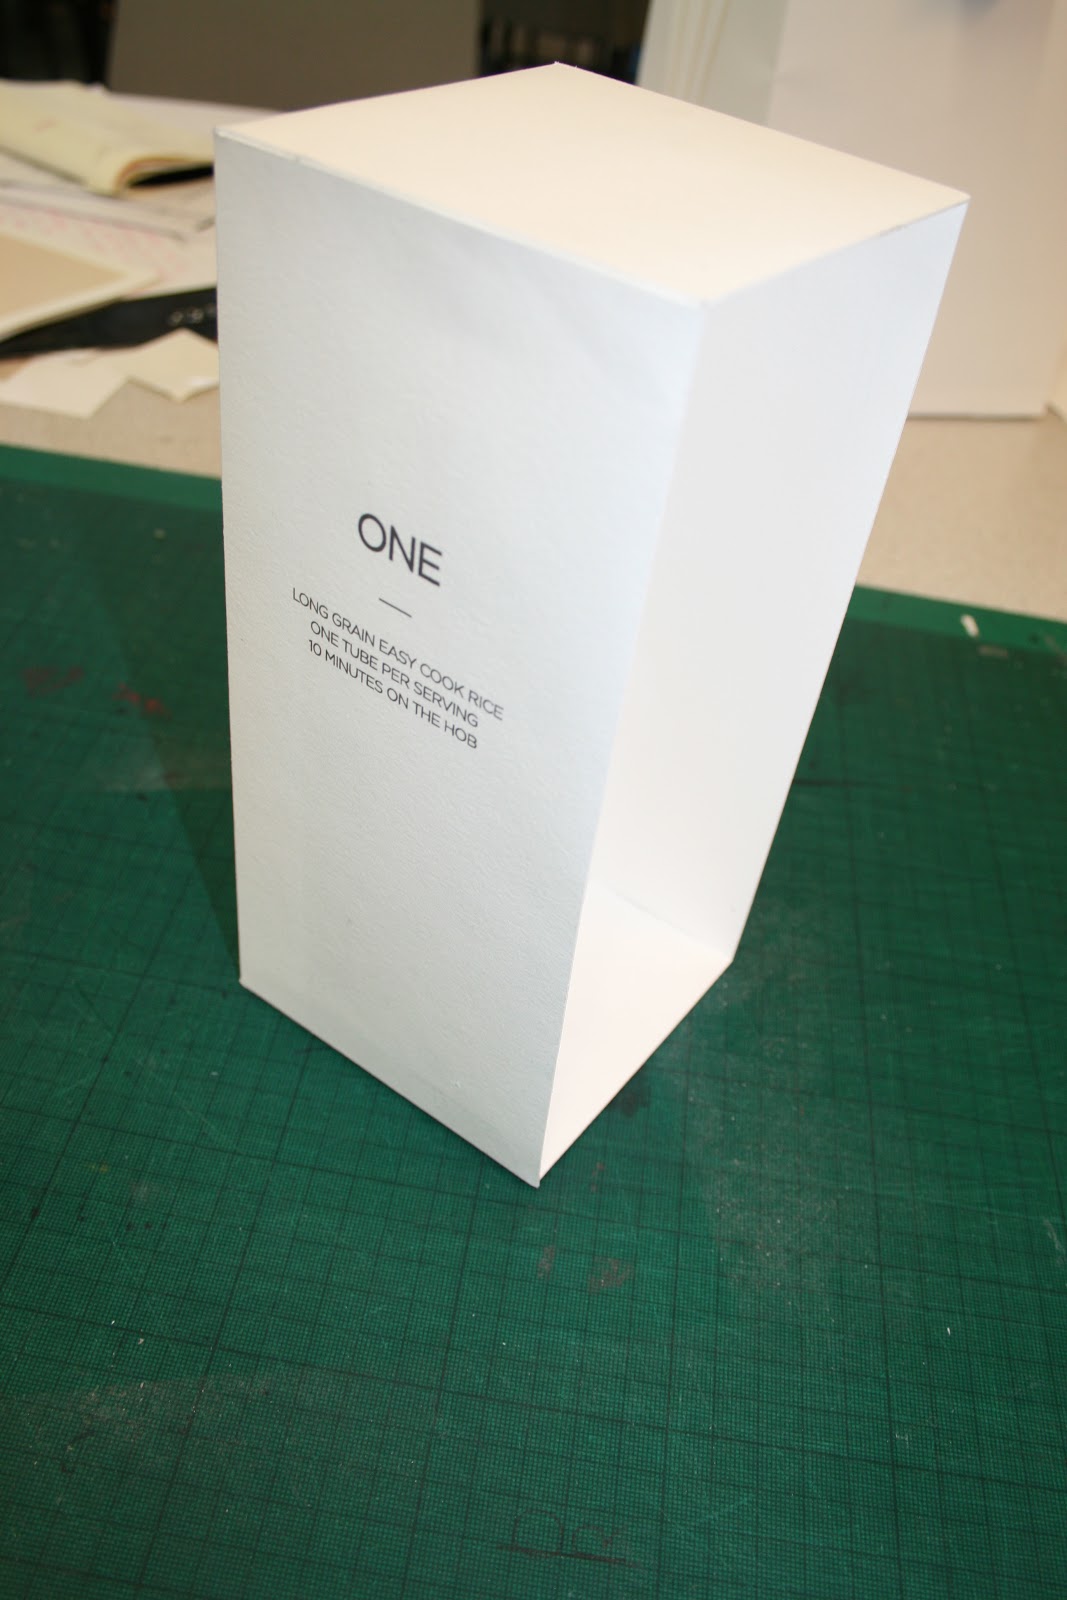
The next stage was to make the box that housed the test tube tray. I wanted to use a creamy/white stock with simple logo and instructions. I chose to print onto water colour paper because it has a nice off white colour and also has a nice texture and grain to it.
My first attempt didn't work. I measured the net incorrectly. I forgot to measure the area where the test tubes and corks stick out of the top, instead I used the measurements for the acrylic box net. This meant that the net wasn't high enough. In an effort to learn from this mistake I still cut out the net and just extended the necessary sides. This helped me to visualise and see what needed to be changed next time around. It also made me notice that the logo was actually on the wrong side!


This stage helped me decide that I wanted the edges of the box to have folded in flaps to make the card thicker and stronger. Also placing the acrylic bos inside made me aware that it wasn't very clear from the front what the product was. I therefore decided to make a label to go on the front.


Second attempt at the packaging:


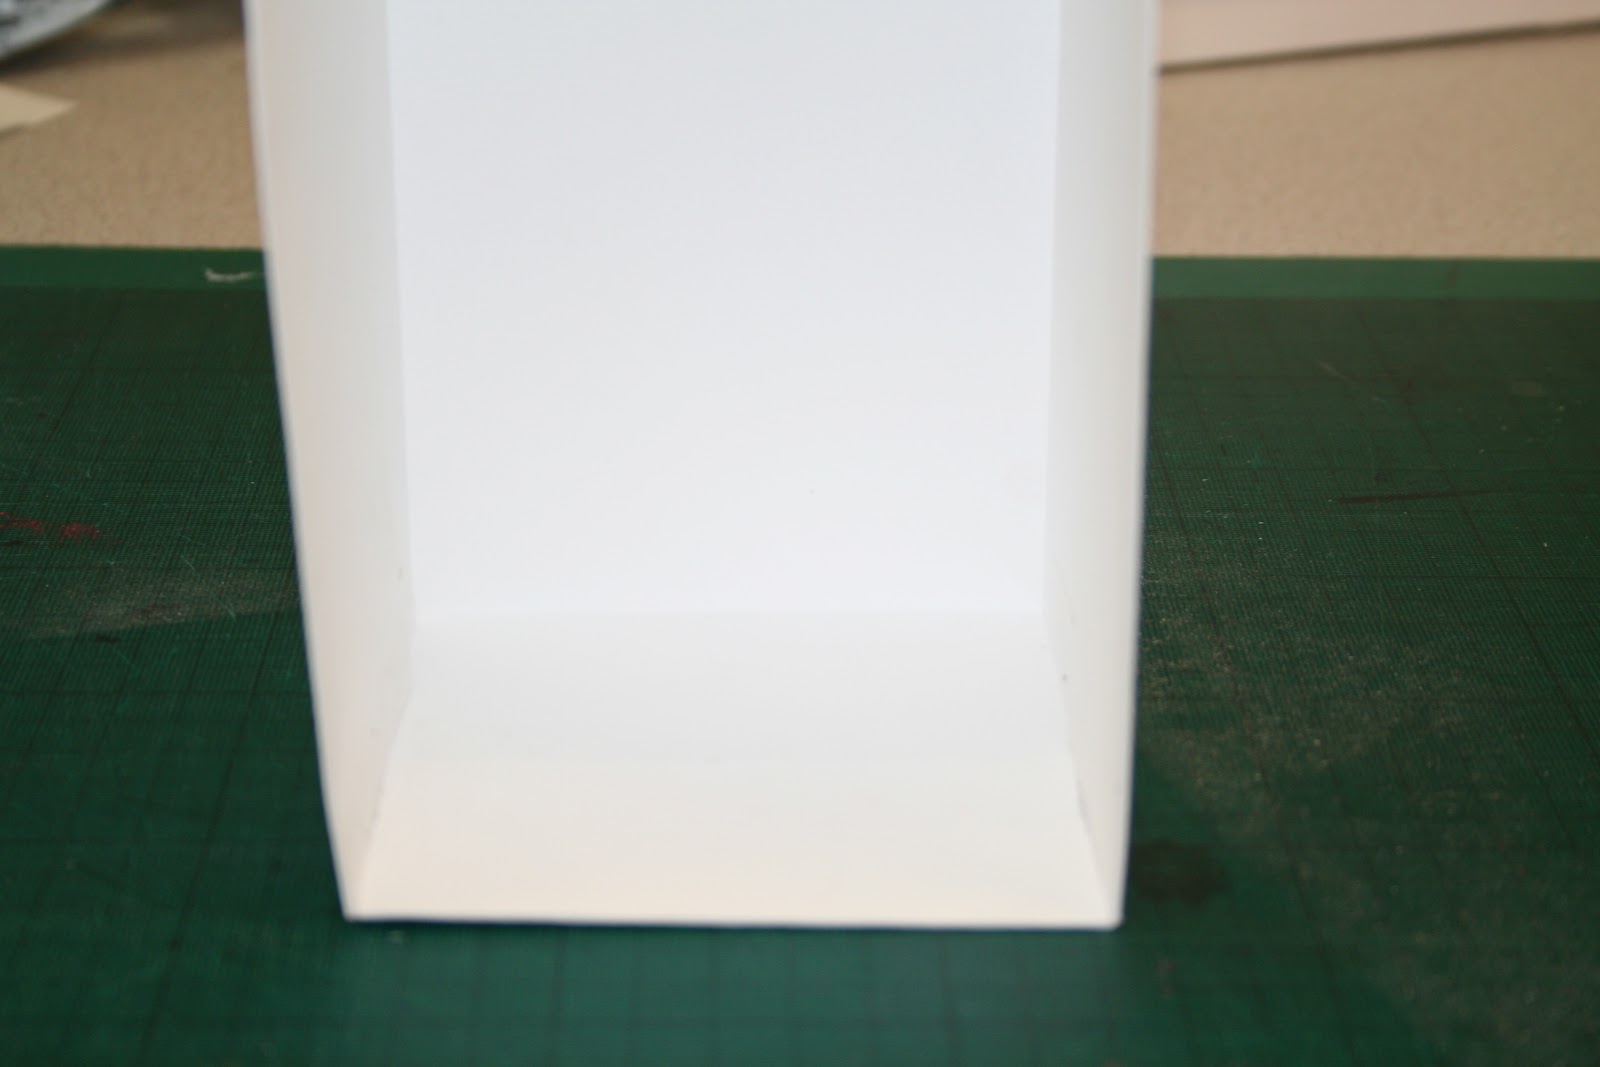
The test tubes fit perfectly inside.


To keep the test tubes inside and stop them from sliding out I am attaching string. Here is some experimentation.


 |
| MY favourite is this one. It looks clean and sophisticated. |
I quite like the idea of it being wrapped around lots of time quite excessively, but I will try different combinations first.


10 times round seems to look right to me. It gives it an earthy feel and matches the rice.
As I mentioned earlier the front needed some information about the product, so I therefore printed a label on the same stock as the packaging


Subscribe to:
Posts (Atom)